How to setup a GoldieTech Node
All nodes hosted with GoldieTech are fully managed by our support team to ensure they are kept up-to-date and earning you rewards. When you create an order with GoldieTech, we require a some details from you. In this guide, we will explain how to successfully create a node, and order hosting.
1. Buy Flux
All nodes have a flux lockup requirement. When you host a node with GoldieTech, your Flux stays in your custody at all times.
For the most up-to-date list of exchanges that support Flux, please visit Flux Cryptocurrency (runonflux.io)
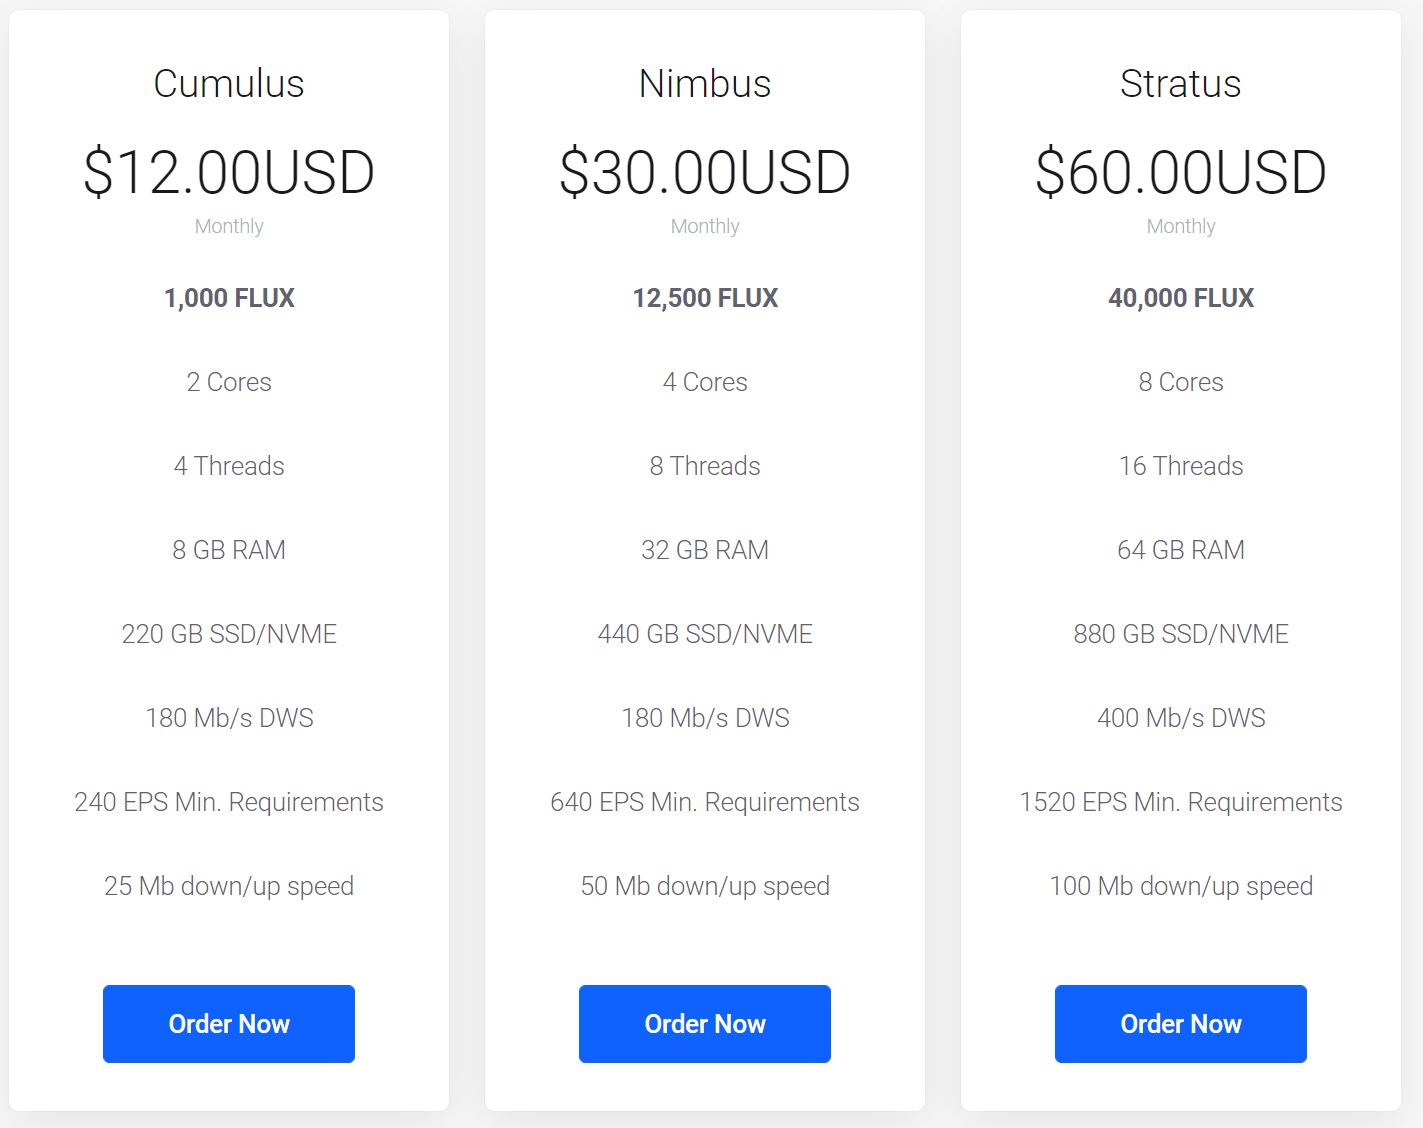
Each node tier has the following Flux lockup requirements:
- Cumulus - 1,000 FLUX
- Nimbus - 12,500 FLUX
- Stratus - 40,000 FLUX
2. Download ZelCore
ZelCore is a non-custodial wallet that supports over 450 tokens. We will need ZelCore to create our node.
Download ZelCore here: Zelcore – Buy & Store Crypto
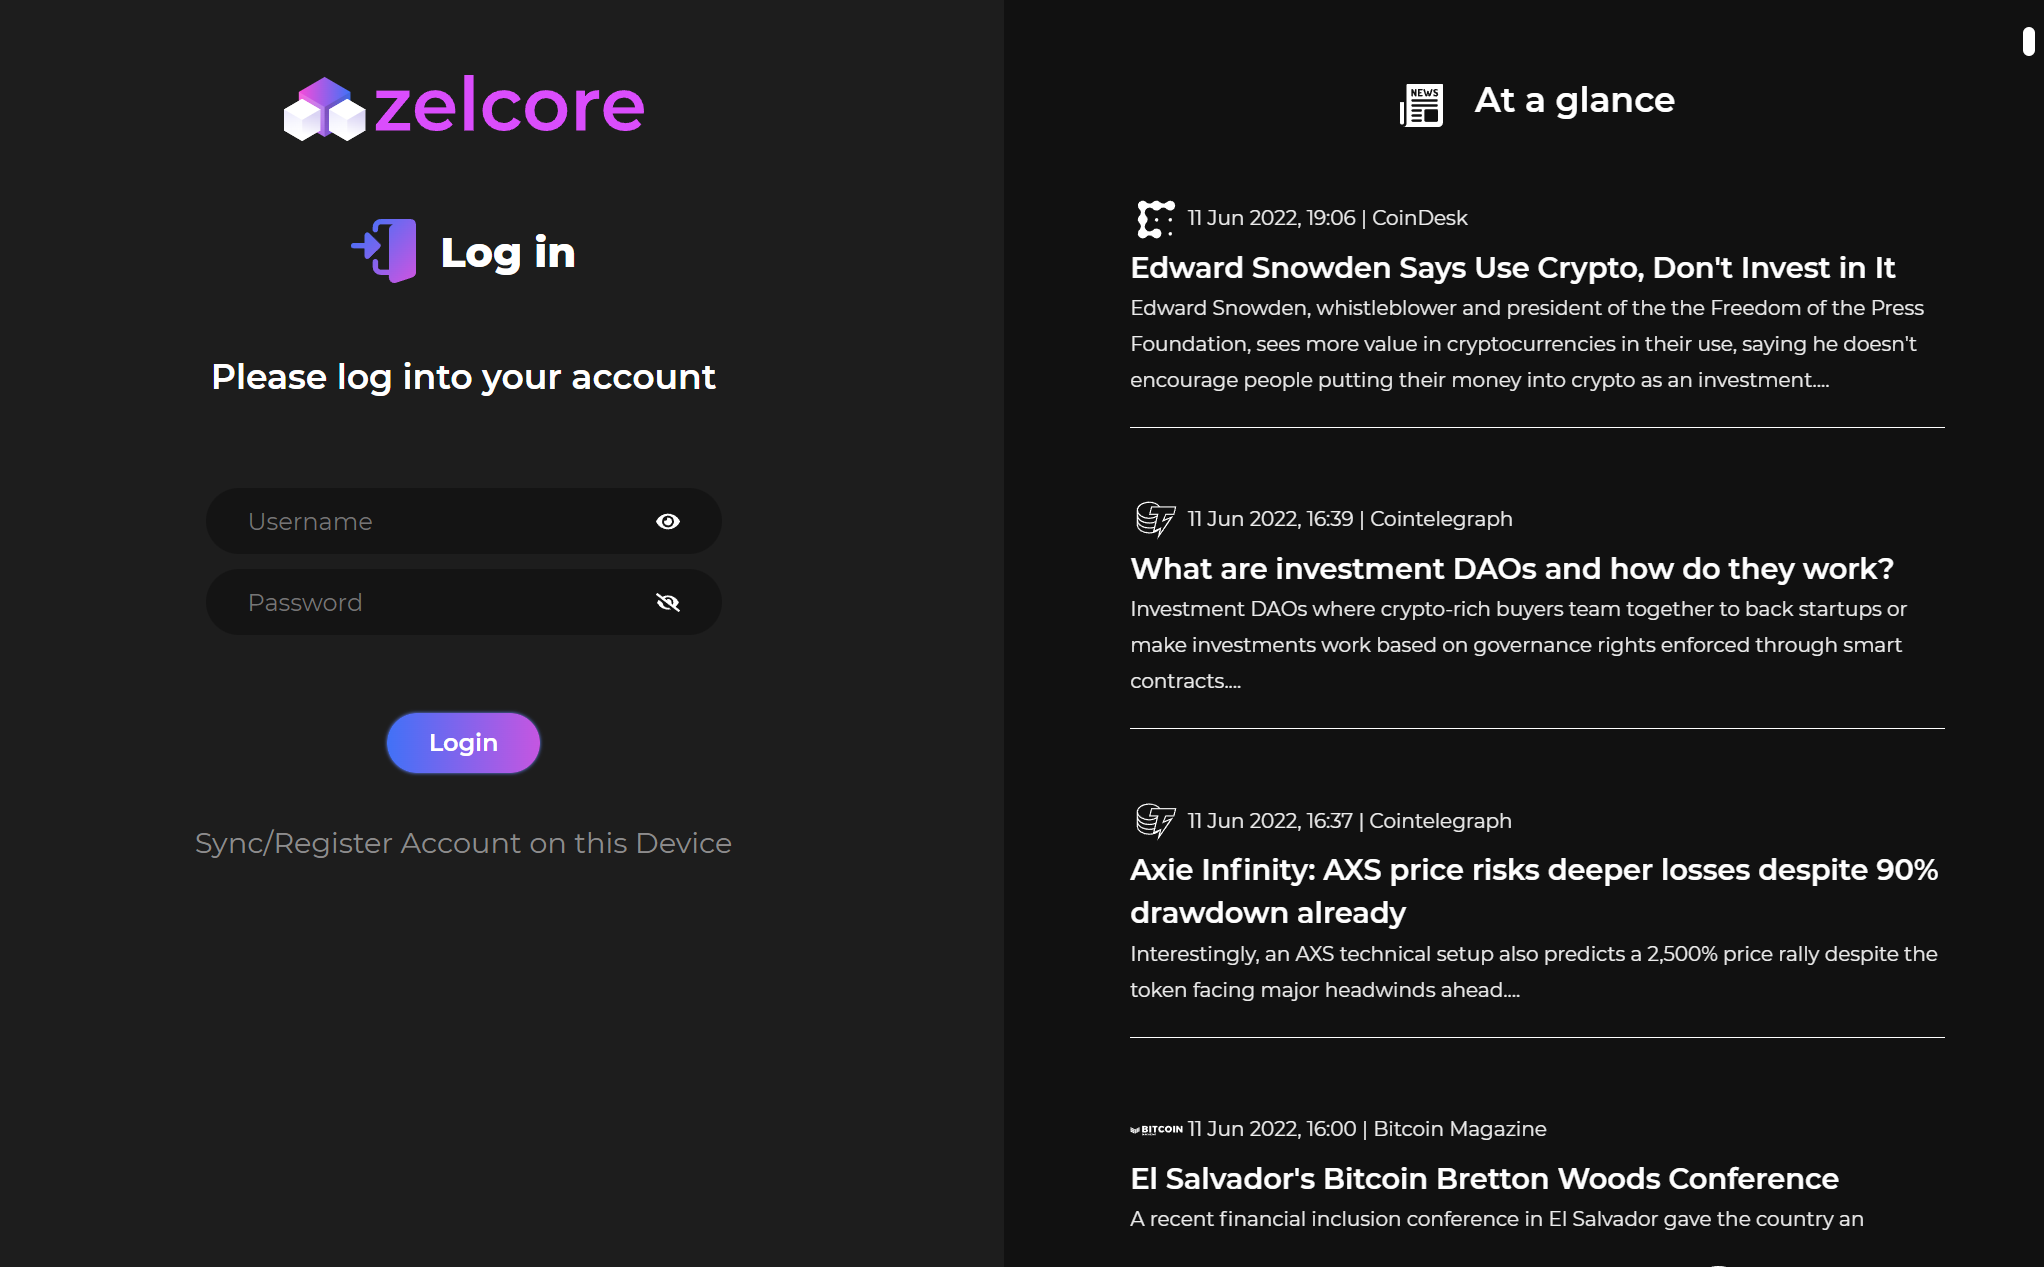
3. Login
Existing users can login.
If you are a brand new user or haven’t never used the wallet ever, then “sync/register account on this device”. It will also give you a option of “Create recovery password mechanism” which is great to recover lost password in case you ever forget your login credentials.
4. Add Flux to your wallet
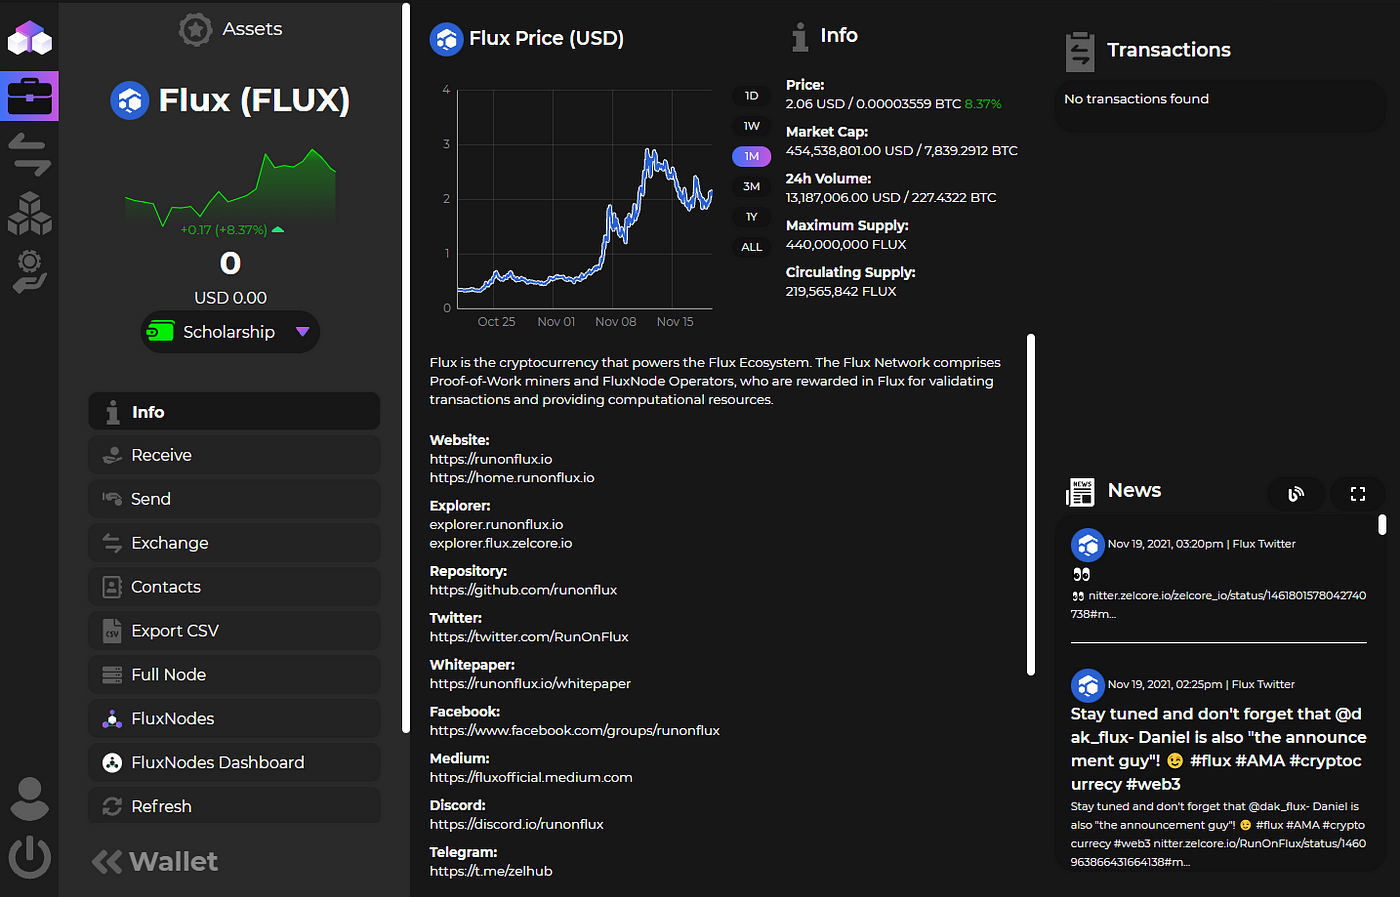
Every zelcore account comes with (6) Wallet addresses for your convenience. These wallets have different addresses for all assets. You can rename the wallet names if you like.
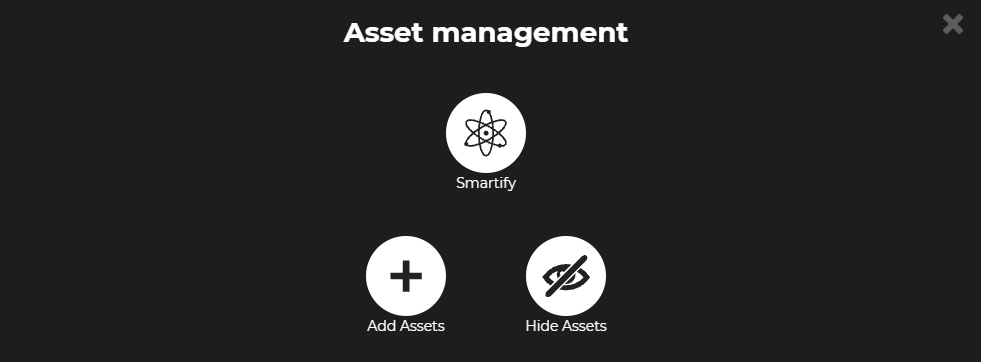
Decide which wallet you would like to use as your main wallet of choice, and click on “manage asset” & then click on “+ assets” to add FLUX or other coins/tokens of your choice (Note you may need to click "Show 0 balance")
Click on the “receive” & copy the addresses and either write down or save it somewhere. Send your Flux to this address. After a couple of minutes, you Flux should appear in your wallet.
5. Create the Node
From in your ZelCore, select another of your wallets. This wallet will become your node wallet. You can send the node collateral to any of the zelcore wallets (payments, income…). You can use either one wallet to set up all your nodes or distribute among other wallets if you like.
Now, from your main wallet, send the follow EXACT Flux amounts to your selected node wallet:
- 1,000 FLUX for Cumulus node
- 12,500 FLUX for Nimbus node
- 40,000 FLUX for Stratus node
Don’t worry about the fees since they will be automatically deducted from your balance.
Now, navigate to Apps->FluxNodes
If all went well, you should now see a Flux node has been generated
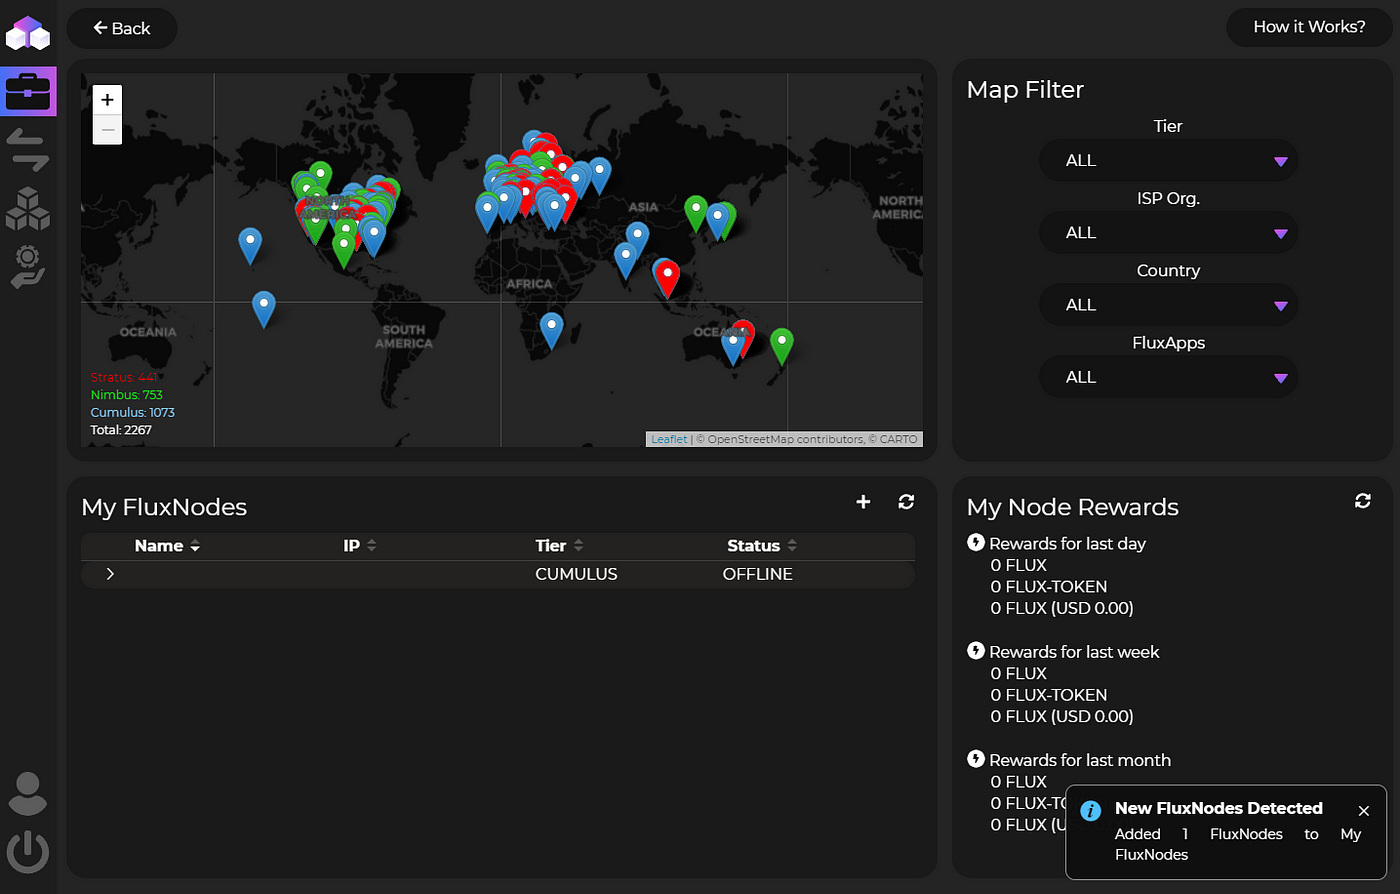
Remember, min. 100 confirmations (3.5hrs) are required to start the node. Confirmations are listed in your node's details.
6. Gather Node Configuration details
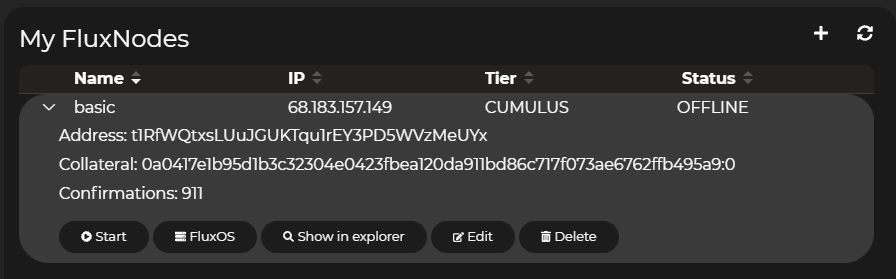
Go ahead & click on ">" and it will expand the menu as shown below. You will notice that the confirmations are also being displayed.

Next, click on “edit”
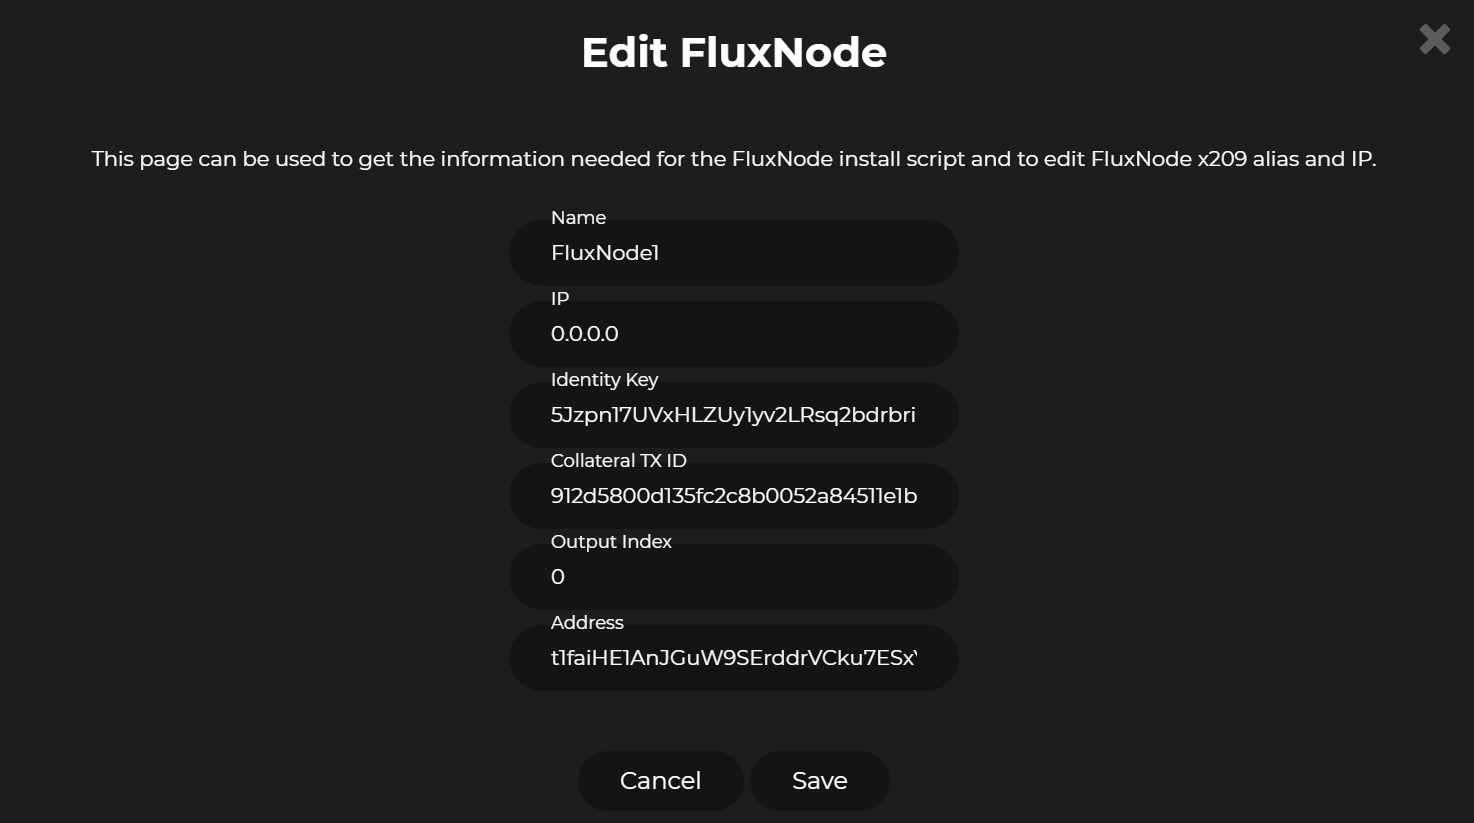
When you do this for the first time, your node will not have a name or IP address. Feel free to give your node a name. The IP address field is purely visual, and has no bearing on the node's operation, therefore we advise you simply enter "0.0.0.0" to this field, as this will automatically update when the node is live
Take note of the Identity Key, Collateral TX ID, and Output Index. We will need them later
7. KDA wallet address
In ZelCore, go to your main wallet and click on “manage asset” & then click on “+ assets” to add KDA (Note you may need to click "Show 0 balance")
Click on KDA to bring up a detailed view of your KDA wallet.
Click on "Receive" and copy your wallet address. Use this wallet address in your Node order
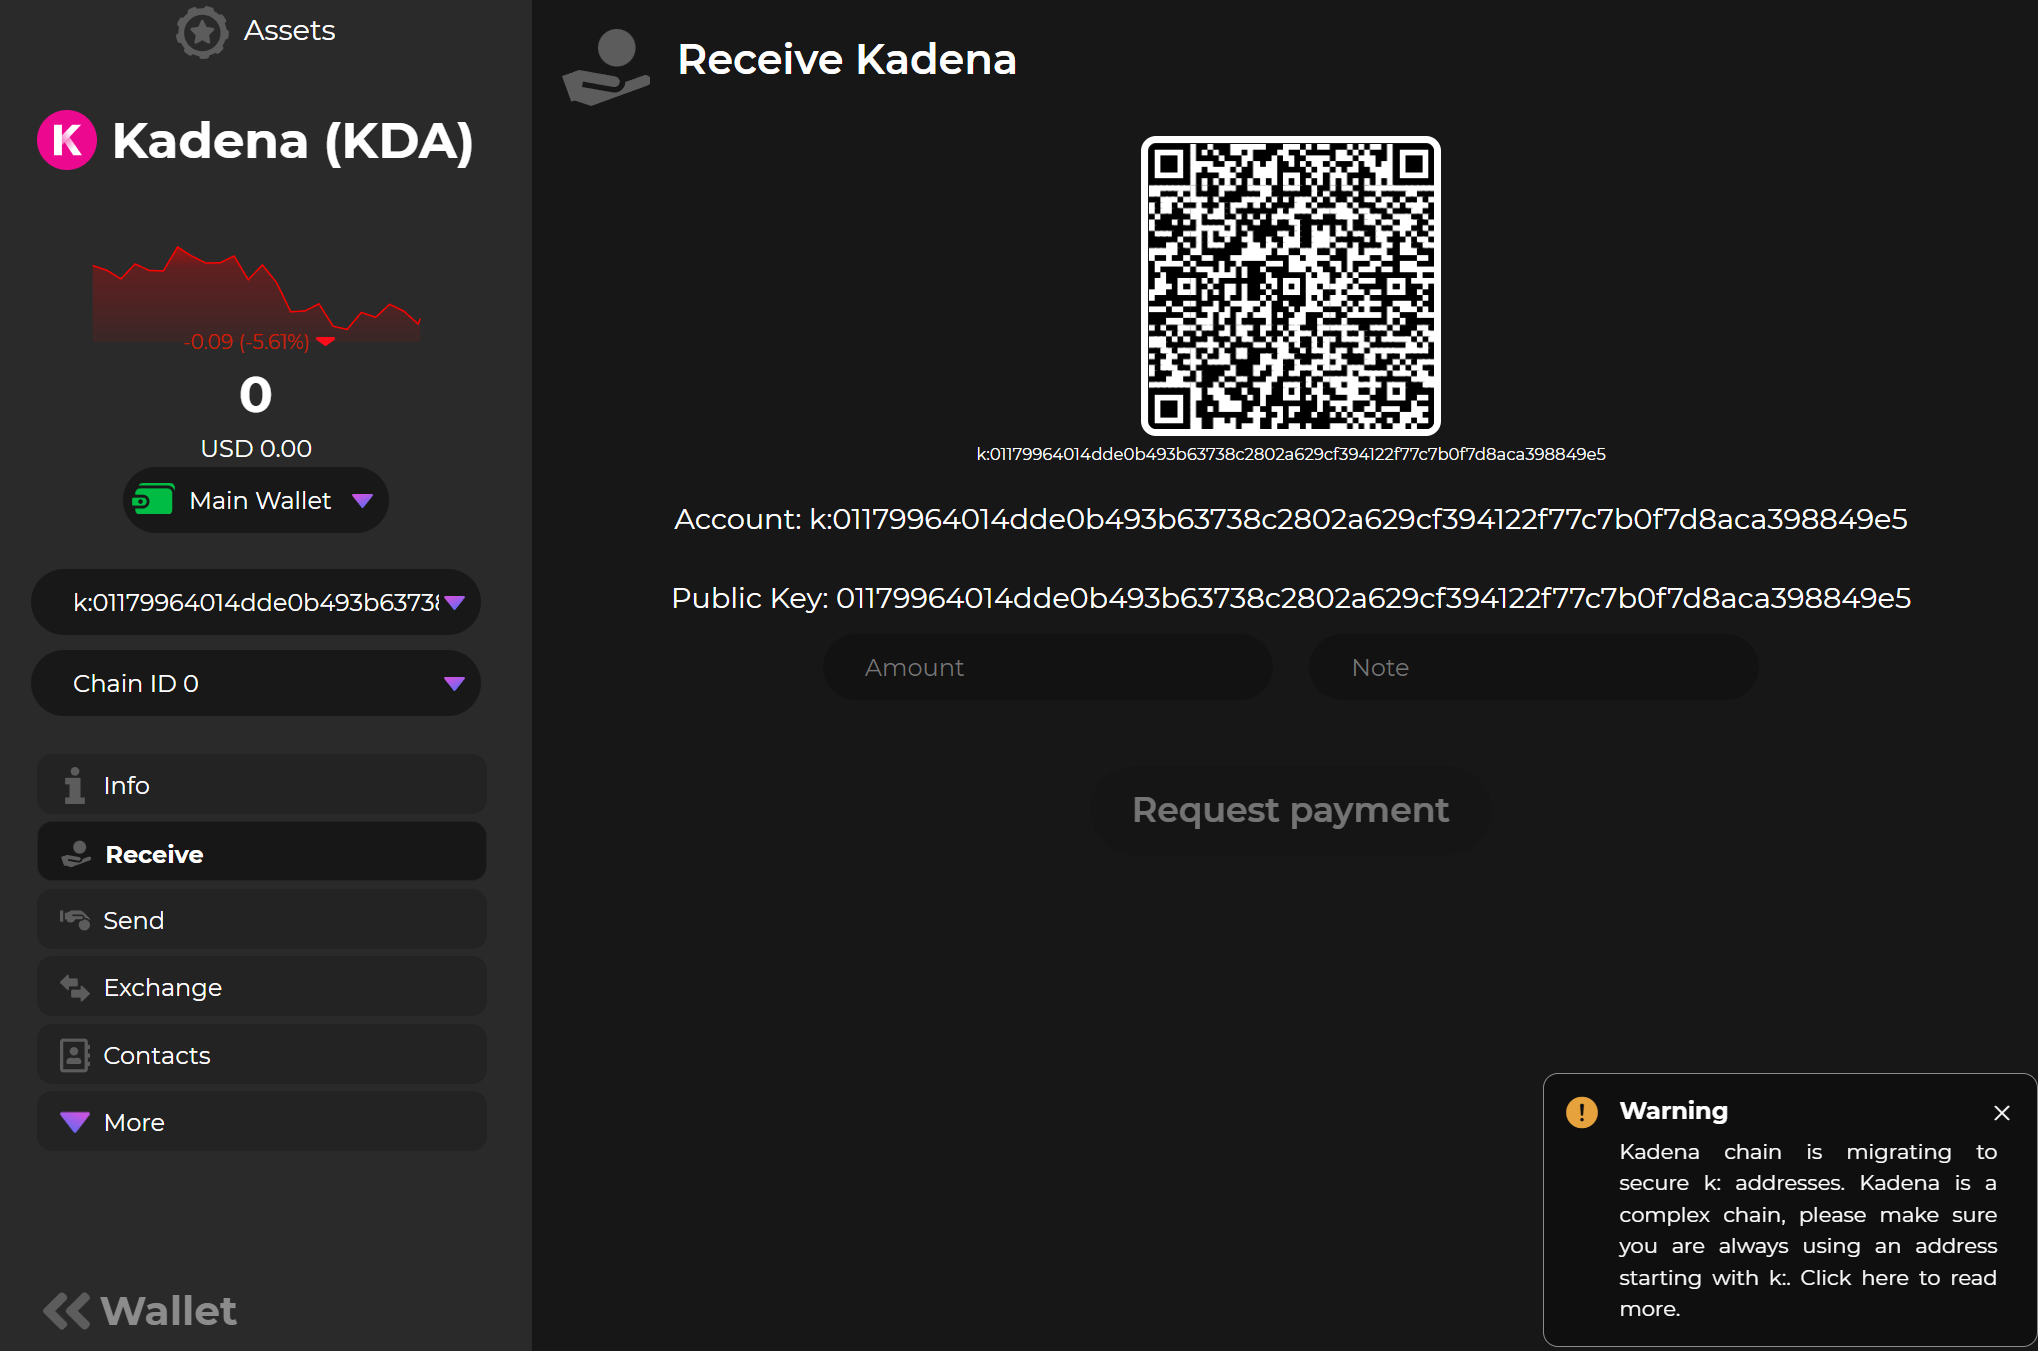
Note: Make sure the wallet address starts with "k:"
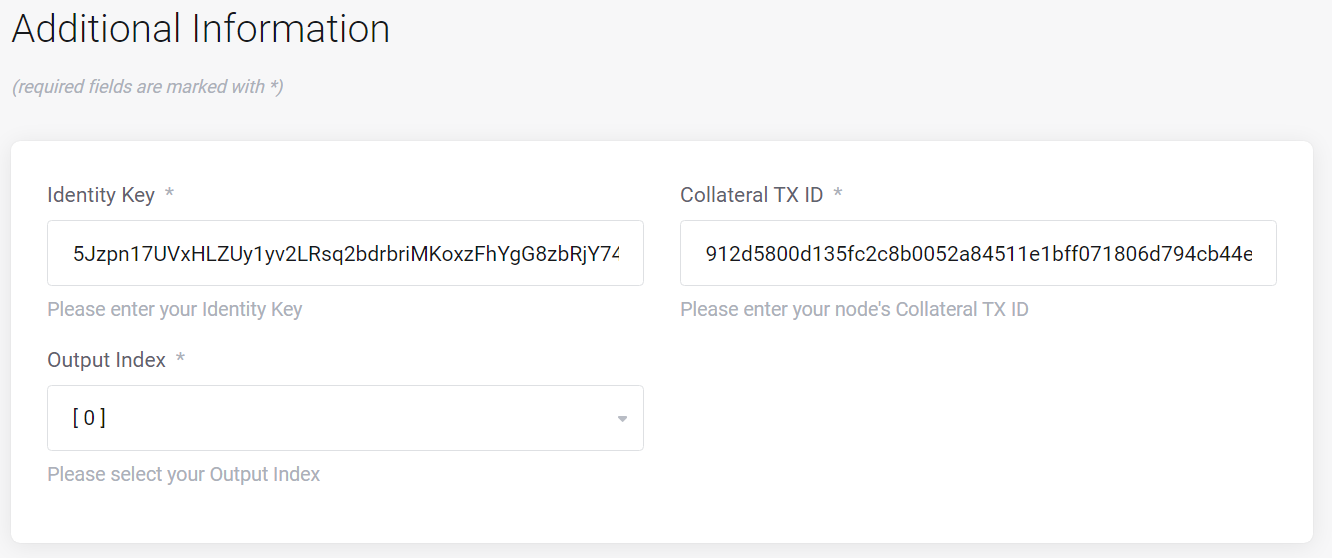
8. Creating the order
On our site, creating an order for the node(s) you wish to order GoldieTech Nodes
In the additional Information section, you will now enter in your node's configuration information (Identity Key, Collateral TX ID, and Output Index, KDA wallet)
Click continue, where you will be taken to your basket. Complete the checkout and payment to complete your order.
DO NOT START YOUR NODE IN ZELCORE YET
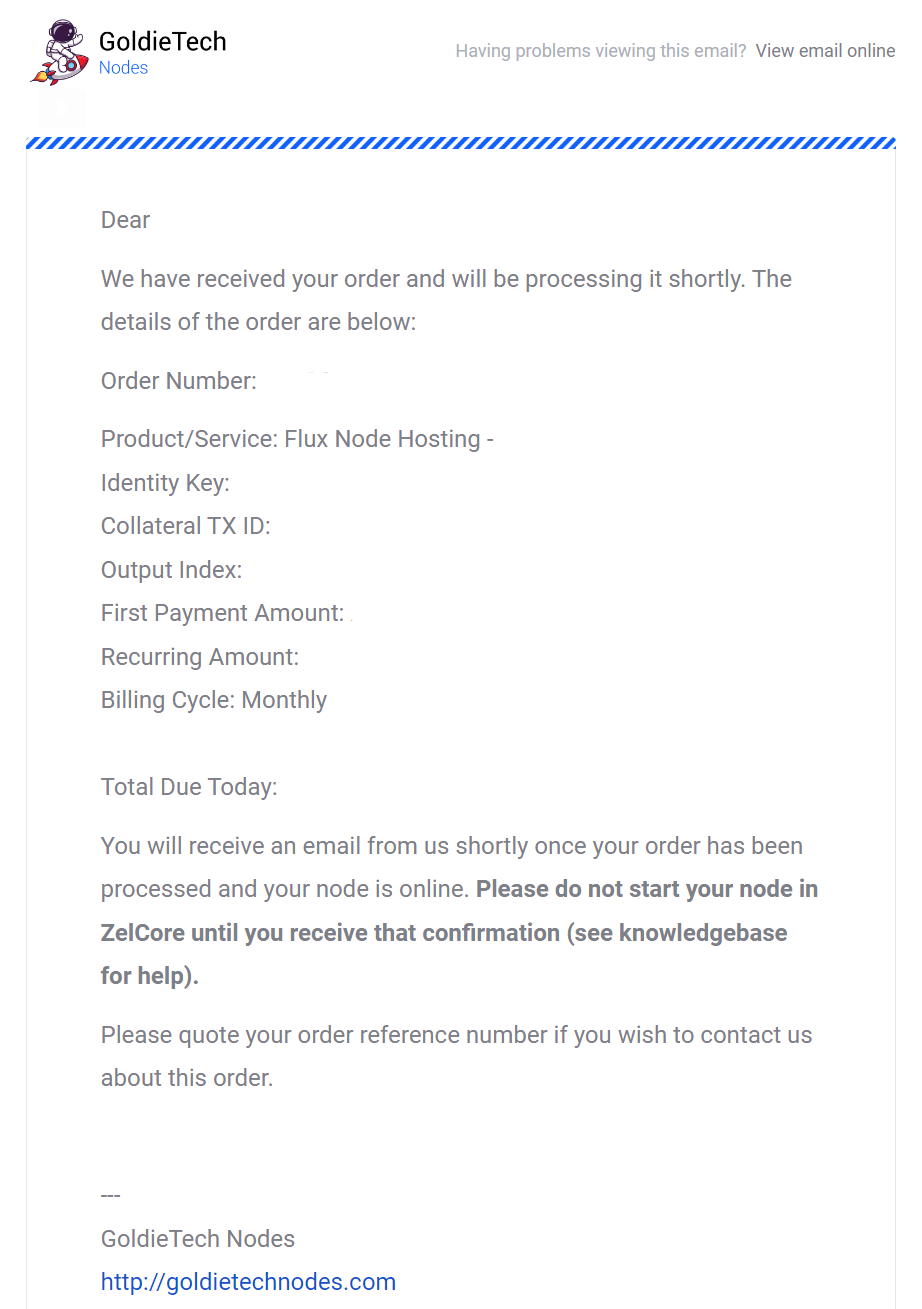
Note: You will need to first create an account AND verify your email before you can complete the order
9. Node Creation
At this point, you will receive an email of confirmation. You should keep this email for your record. As stated in the email, do not start your node in ZelCore yet!
At this stage, we will setup your node on our servers. This is usually done within a few hours, however it can take up to 1 day. If you have any concerns, please create a support ticket.
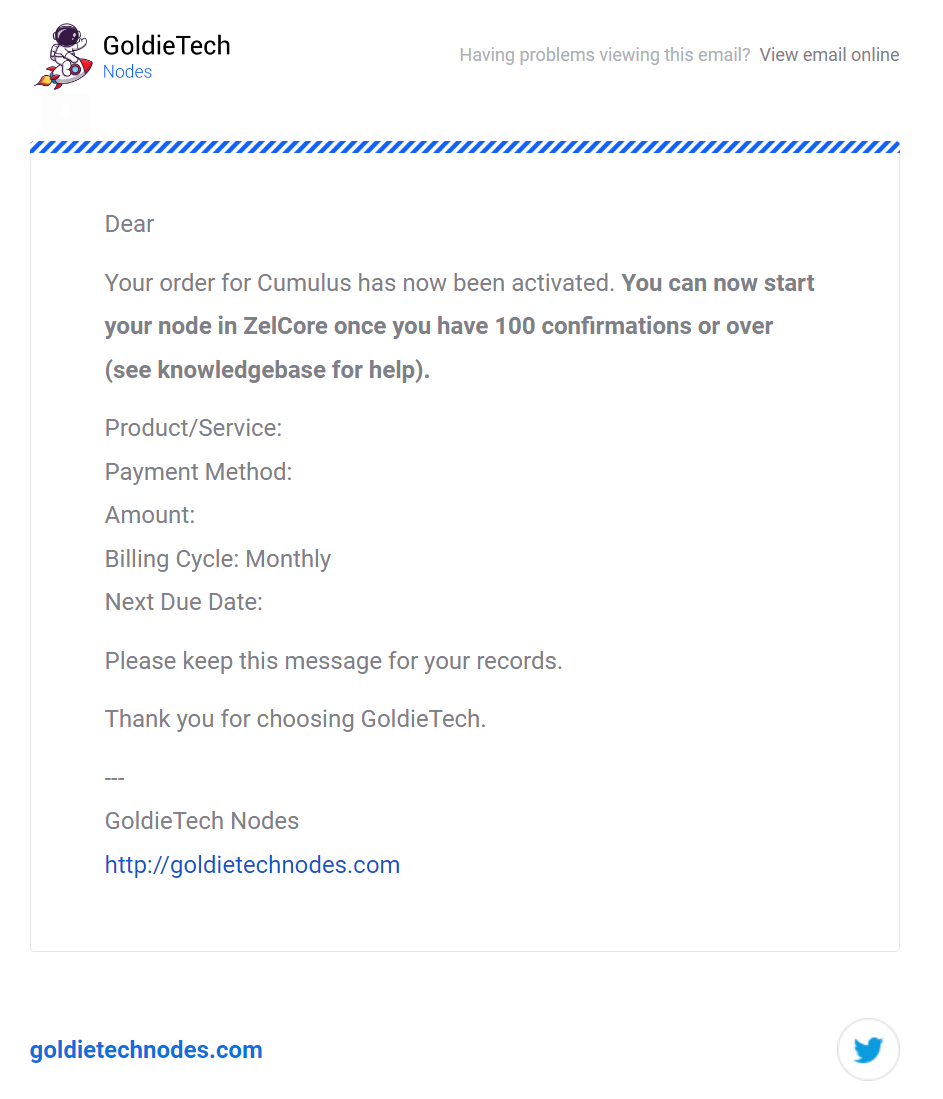
Once your node is live on our systems, we will confirm your order and your subscription will become live. You will receive an email with all the details of your subscription, as well as instructions to start your node in ZelCore.
10. Check your node benchmarks
Now the node is live, you are able to view the node online and ensure it is ready to be started.
On our site, navigate to your dashboard and click on services.
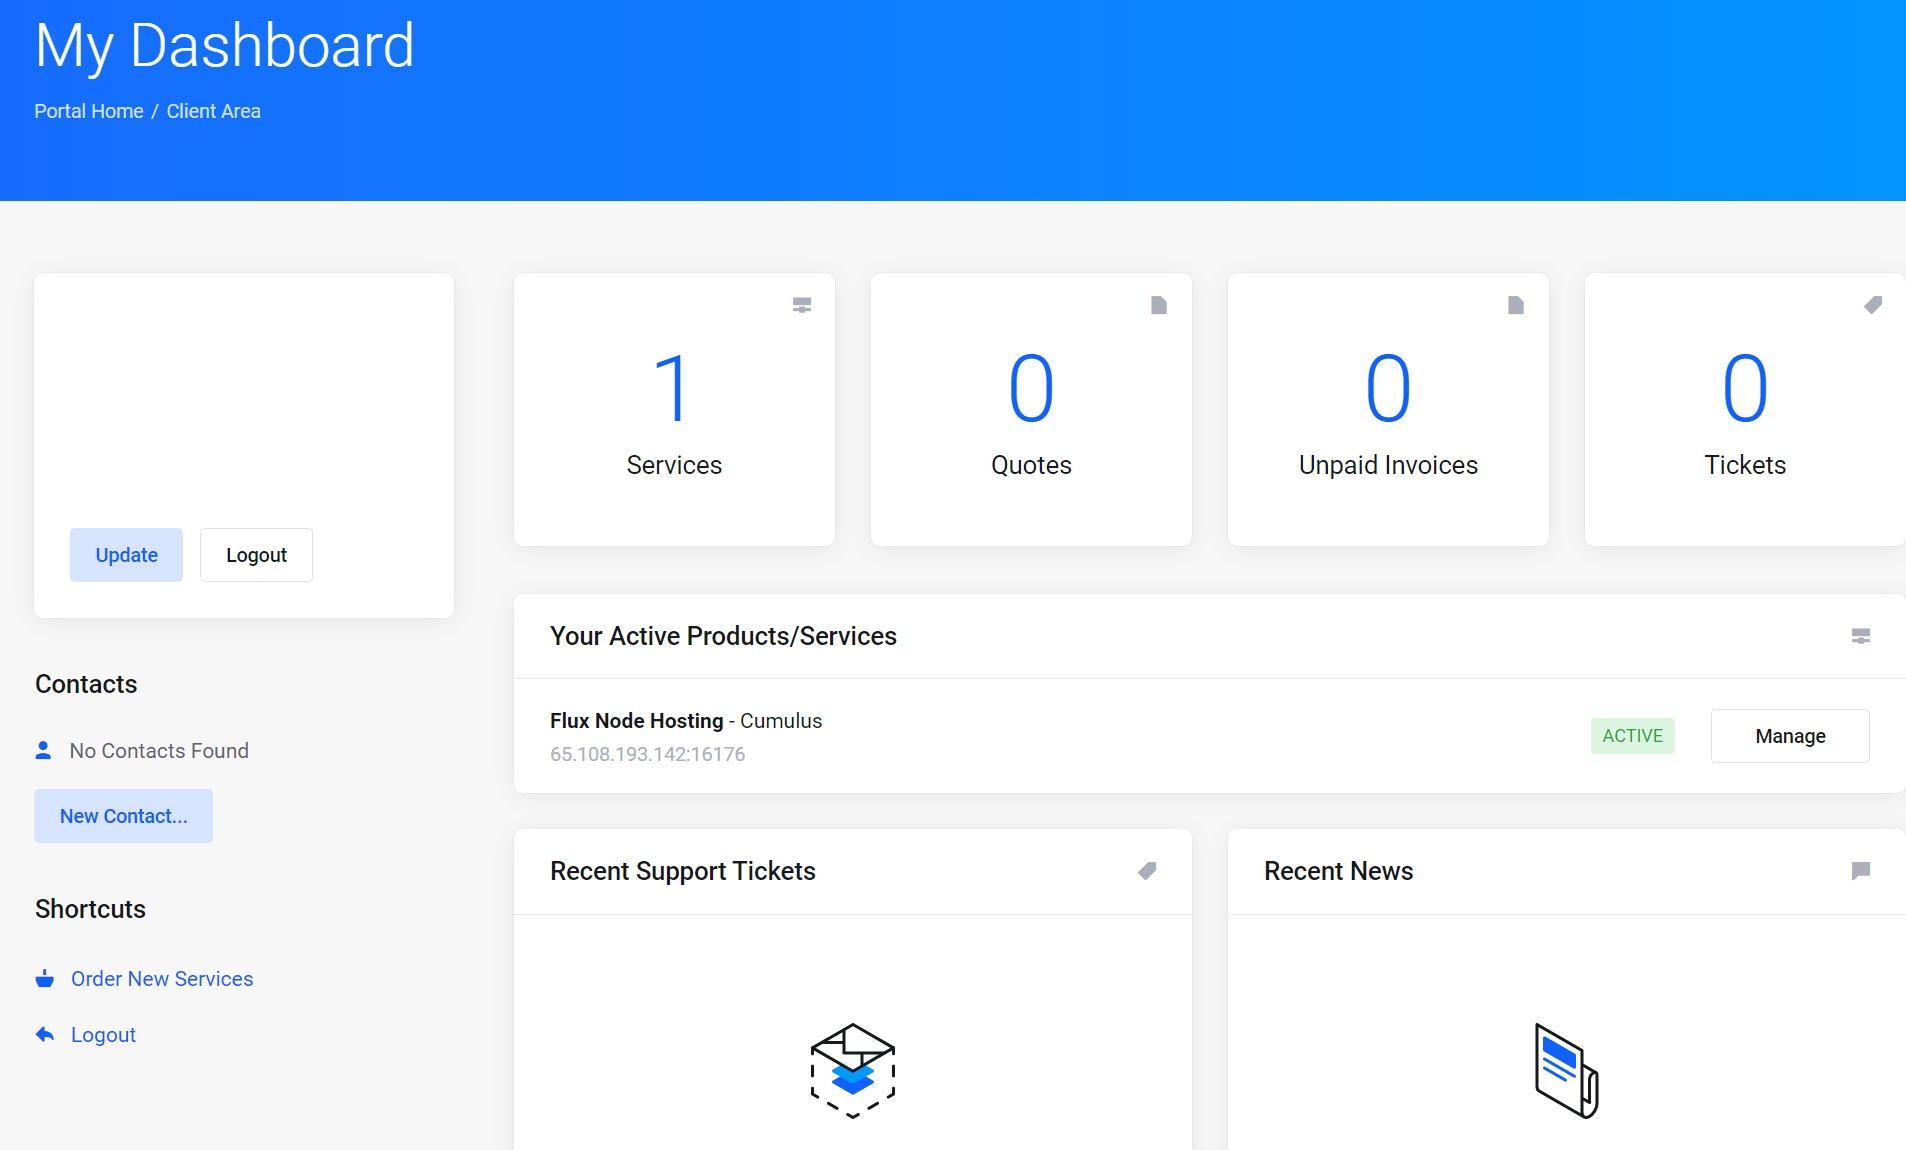
Within your Services, select your new node.
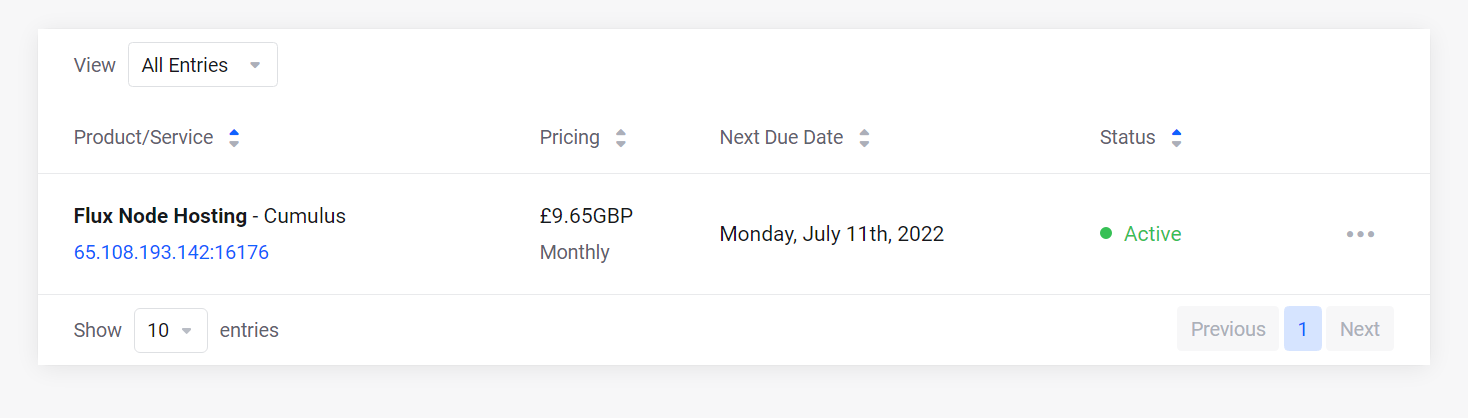
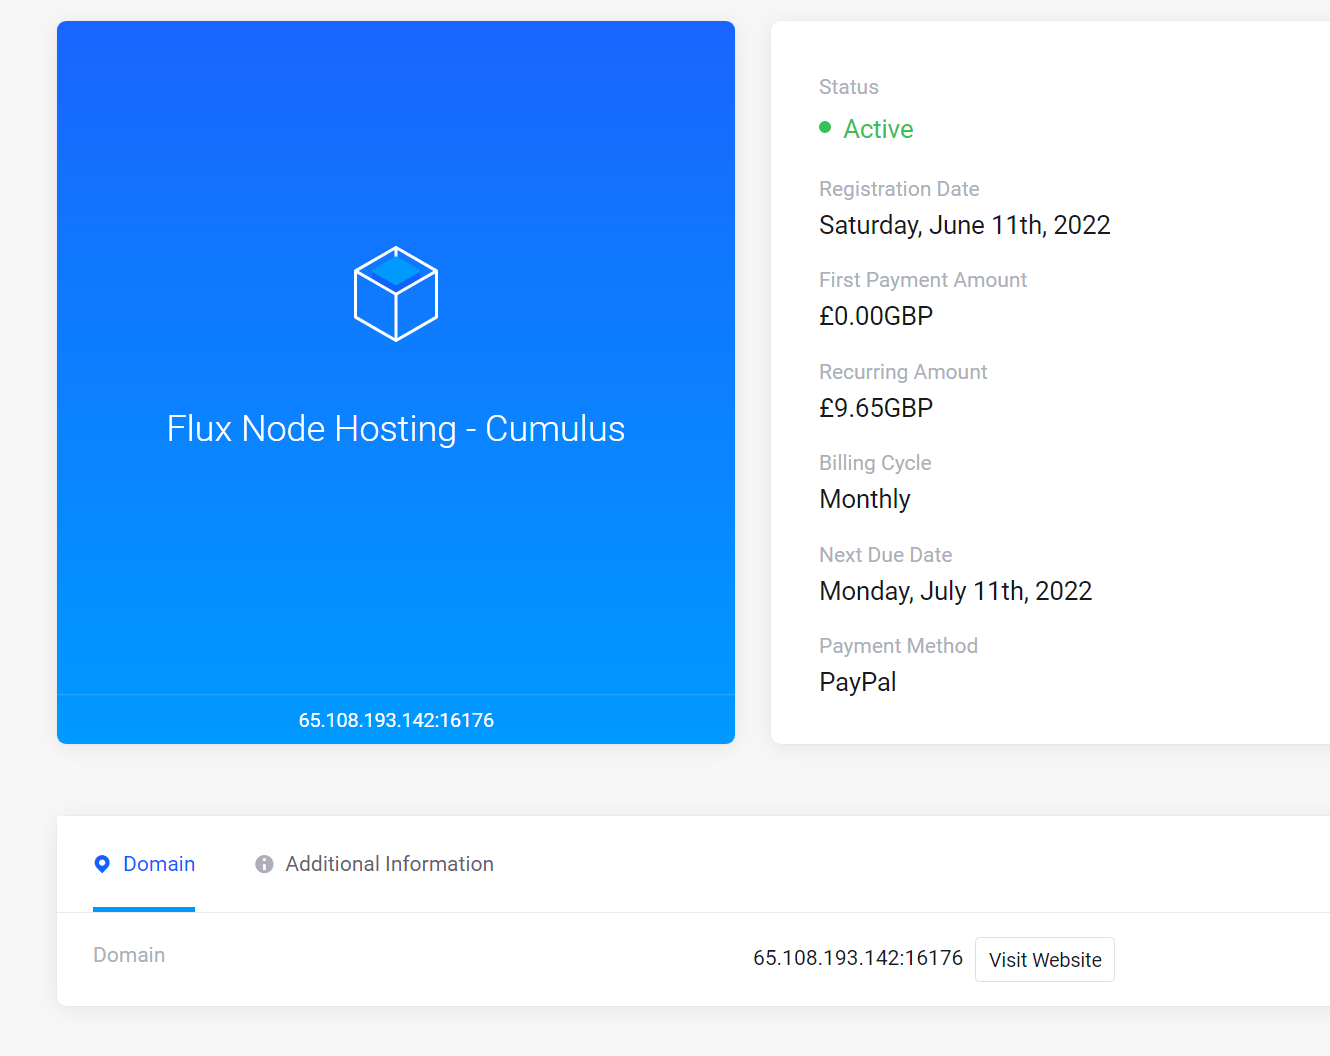
From here, you can manage your node, cancel the service, and view your node's Flux dashboard. Click the IP address or "visit website" button to get to your node's flux dashboard
From this site, you can view your flux node on the Flux chain. The status will be listed as "Expired" or anything else, this is ok for now.
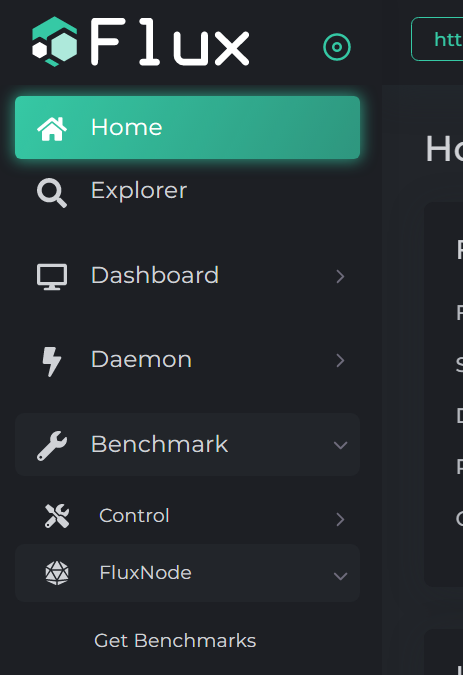
on the left hand side, navigate to Benchmark->FluxNode->Get Benchmarks
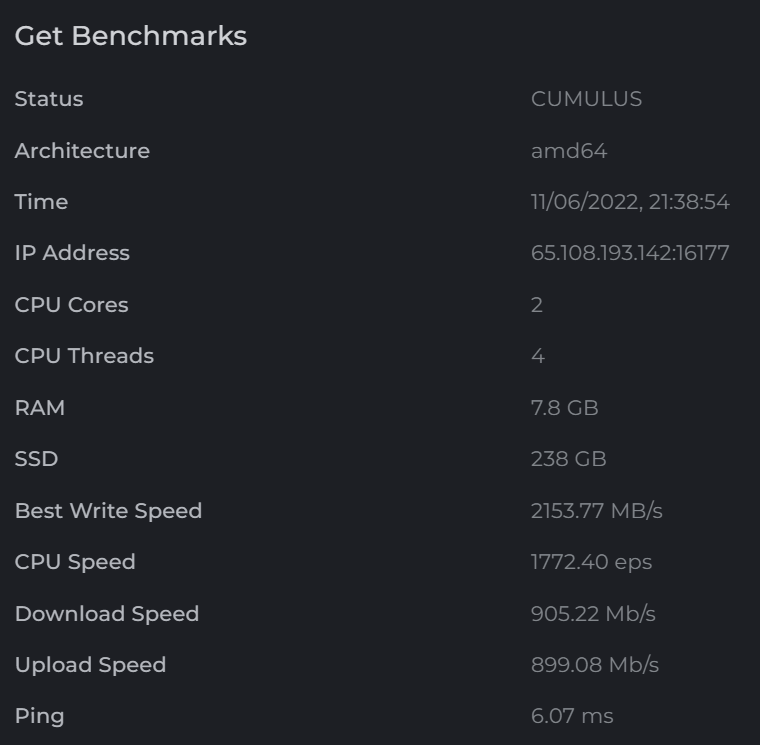
From this page, you should be displayed with a list of details about your node such as status, CPU cores, SSD, etc. The main thing to look for is the Status. If the status is one of "Cumulus", "Nimbus", or "Stratus", then your node is passing the hardware benchmarks and is ready to be started
11. Start your node in ZelCore
Now we are finally ready to start our node and earn some Flux
Within ZelCore, navigate to the FluxNode tab within Apps.
Make sure you have 100 confirmations before you can start the node
Go ahead and click on the “Start”. A window will pop up and you will be prompted with more information. Click on “Start FluxNode”
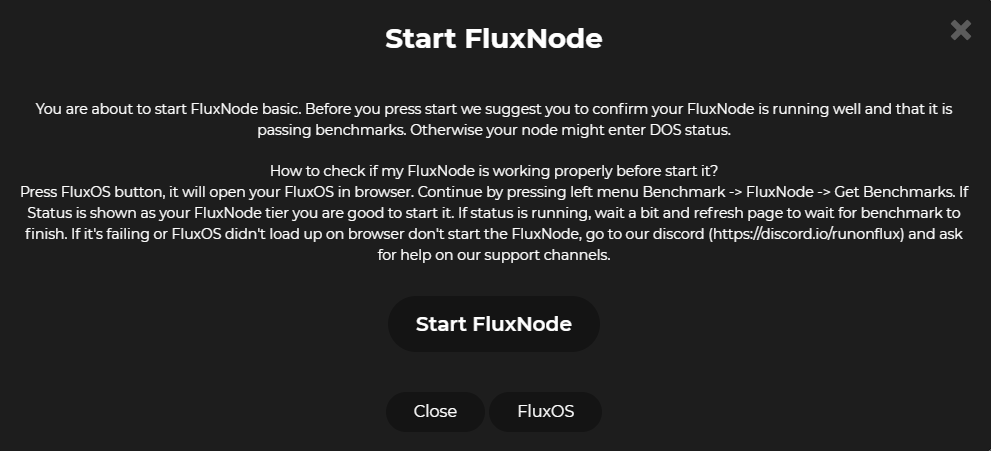
A new window will then open up and will display the status as “Starting”
After some time the status will change to “Confirmed” this means you have successfully started your FluxNode. Nothing else is required.
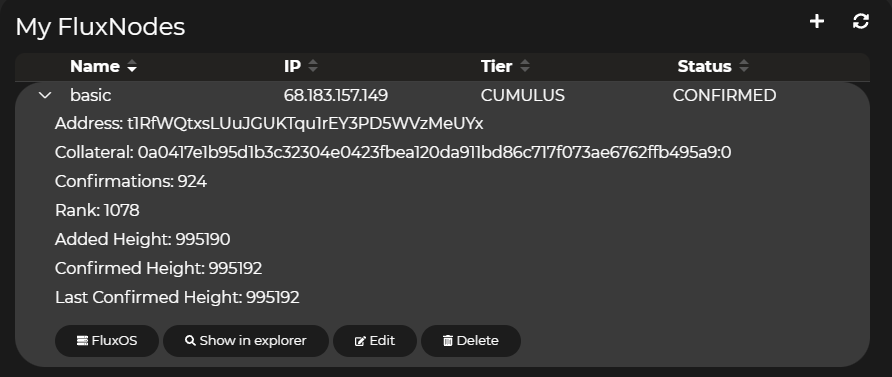
Congratulations. Your node is successfully online and earning you Flux rewards.
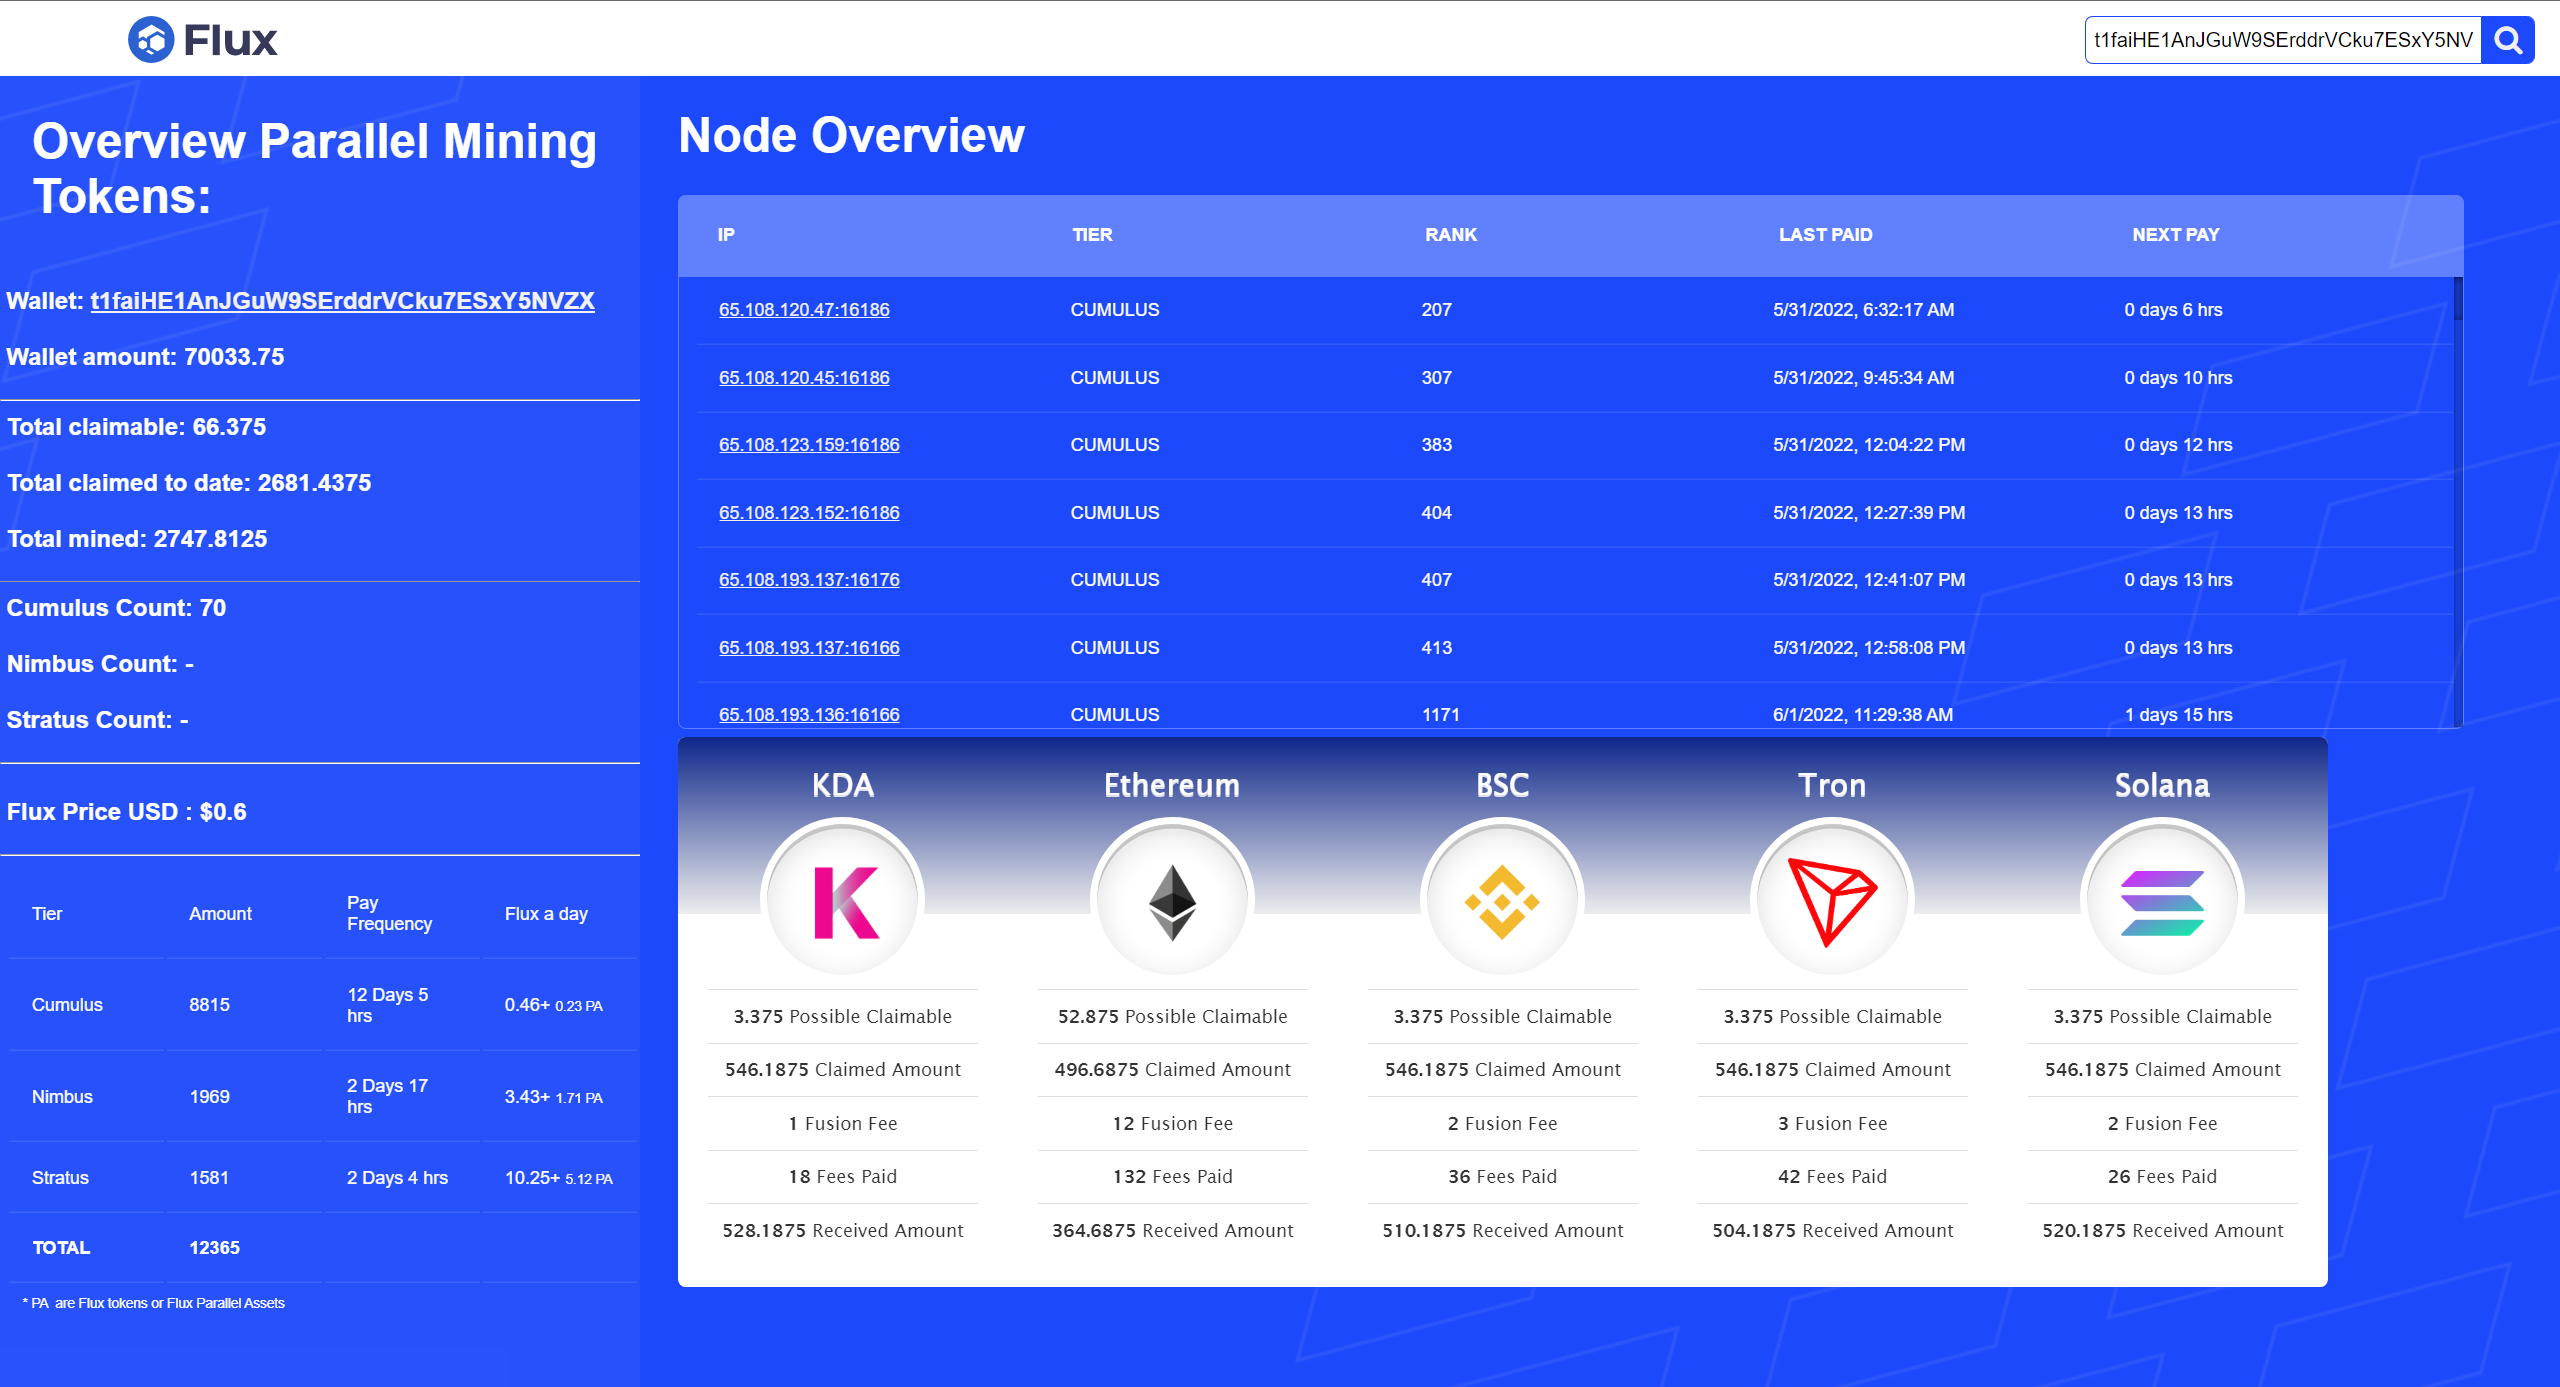
12. Check next reward time (Optional)
This is a useful tip. If you wish to view when your node(s) are next due to earn rewards, there's a great site for this. First, get the wallet address of your Flux nodes (the one you sent the collateral to)
Copy the receiving address. Next, copy the link bellow and replace "YOURADDRESS" at the end, with the address you just copied.
https://paoverview.app.runonflux.io/?address=YOURADDRESS
You should be presented with a page that displays a plethora of information about your nodes, the Flux rewards queue, and more. Feel free to bookmark this site for future.